WOODEN FURNITURE & HOME
Reference-based editorial guide, prepared with AI assistance. Not a Wood Center build or test.
Use a hardening, sandable wood filler when a repair needs to become flush before finishing. For a small nail hole in already finished wood, a color-matched, non-hardening wood putty may be the better fit. The important distinction is whether you need to sand and coat the repair or touch up a surface you want to leave intact.
Product names overlap, so check the exact label. “Filler,” “putty,” and “patch” do not guarantee the same behavior across brands.
Wood filler and wood putty at a glance
| Question | Hardening wood filler | Non-hardening wood putty |
|---|---|---|
| Typical job | Level small surface defects before a compatible finish. | Conceal minor holes or marks on finished wood. |
| Can you sand it? | Usually, after the product has dried or cured as directed. | Not if the formula remains soft; remove the excess during application. |
| When does it go on? | Often before finishing, but preparation and staining order vary. | Often after finishing; confirm the specified coating sequence. |
| How does the color work? | Use a paintable or stain-compatible formula for the planned coating. | Choose a shade that matches the finished surface. |
| Suitable outdoors? | Only if the exact product and required protective coating permit it. | Check the label; softness alone does not prove weather resistance. |
This compares two common product types. Two-part epoxy fillers and repair sticks have different instructions; do not apply the table to them automatically. For the wider decision between a touch-up and a makeover, see the furniture care guide.
When wood filler makes sense
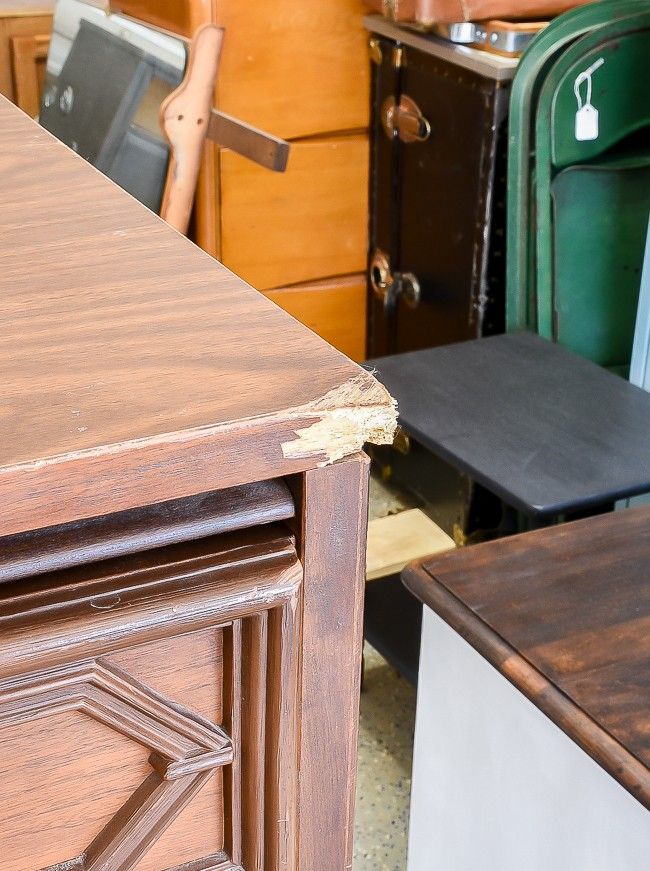
Filler is useful when a small dent, fastener hole, or surface gap would remain visible through a painted finish. On a new shelf or tray, a suitable filler lets you level the defect and prepare a continuous surface for primer and paint.
The word “patch” on that container is a useful reminder to read beyond the product name. ZAR describes Wood Patch as a latex compound that can be sanded, painted, and stained. Those properties matter more than whether the front label says filler or patch.
Keep the repair local. Smearing filler widely over surrounding wood creates extra sanding and can complicate a stained finish. For a loose furniture joint, fix the joint first; hiding the gap does not establish a sound connection. The epoxy and wood glue comparison starts with the fit of that joint, rather than the appearance of the patch.
When non-hardening wood putty makes sense
A small nail hole in stained trim presents a different problem: sanding the area could damage the finish you want to keep. A matching touch-up material can conceal the hole without leveling the surrounding wood.
For example, Minwax Wood Putty is intended for small blemishes and remains non-hardening. Its directions put staining and topcoating before the putty. Press it into the defect and remove the excess as directed; waiting longer will not turn this formula into a sandable patch.
Match the final wood color rather than the bare wood underneath. A light-colored repair on dark trim can draw attention even when the hole is filled neatly. Check a hidden spot first, including whether excess material can be removed without marking the coating.
Choose around the repair and the finish
- Painting a new shelf: choose a hardening filler approved for the substrate, primer, and paint. Allow it to dry, then sand it flush.
- Touching up finished trim: consider a matching non-hardening putty specified for that surface. Avoid sanding an otherwise intact finish.
- Staining bare furniture: use a stain-compatible filler and check the entire coating schedule on matching scrap first.
- Repairing outdoor furniture: verify exposure limits and the required protective finish. Address water entry or deteriorated wood before concealing the damage.
- Dealing with a deep void, broken joint, or loose screw: stop and choose a repair method for the actual defect. Ordinary cosmetic filler or putty is not a substitute for structural repair.
Do not fill an intentional movement gap simply because it looks like a crack. If a gap keeps returning, investigate movement or a failed connection instead of repeating the same cosmetic patch. On an exposed panel edge, compare filler with banding and solid trim in the plywood edge finishing guide.
How to use a hardening filler before finishing
1. Check the label and prepare the spot
Confirm the permitted surface, maximum repair size, layer thickness, and coating sequence. Remove loose material and contamination as directed. Use the product’s ventilation and protective-equipment instructions; before sanding old paint of unknown composition, check for lead hazards.
2. Press filler into the defect
Use a clean spreading knife and work the material into the area. Slight overfilling is common for sandable formulas, but follow the particular directions. Do not assume a deep pocket can be filled in one pass.
3. Allow the specified drying or curing time
A surface skin does not prove that a thick repair is ready to sand. Follow the label for depth, conditions, and any required layers. Drying of a one-part filler and chemical curing of a two-part material are different processes; neither has one universal waiting time.
4. Sand flush and remove the residue
Once ready, level the repair without digging into the surrounding wood or sanding through thin veneer. Remove dust before coating. If a depression remains, follow the product’s instructions for another application rather than burying it under paint.
5. Check the coating on a sample
Apply the same filler and intended coating system to matching scrap. A sample lets you assess color and surface preparation before working across a visible tabletop or cabinet front.
Can you stain or paint over either product?
A stainable filler can accept a specified stain without necessarily matching the grain or color of the surrounding wood. “Stainable” is not a promise that the repair will disappear. Keep filler off adjacent grain where possible and inspect the sample after the complete finish is applied.
Minwax Stainable Wood Filler illustrates why exact instructions matter: its directions call for a sample, complete drying, and sanding before coating. They also limit hole size to 3/4 inch and specify 1/4-inch layers for deeper repairs. Those are this product’s limits, not rules for every filler.
For paint, choose a filler that explicitly permits the intended primer and topcoat. For non-hardening putty, do not assume you can sand, stain, or paint over it. The Minwax product above is applied after its finishing sequence; another formula may have different requirements.
What about epoxy fillers and repair sticks?
“Epoxy putty” is not necessarily a soft touch-up material. DAP Plastic Wood Epoxy Filler, for example, is a two-component system that hardens and can be shaped after curing. It needs its own mixing, working-time, substrate, and curing instructions. A drillable repair claim does not establish a load rating for a furniture joint.
Wax repair sticks are another category. Their handling and coating compatibility should come from their own labels; do not treat a photograph of a colored wax stick as evidence of how a tub of wood putty performs.
Before buying, answer three questions: does the repair need sanding, is the surrounding wood already finished, and what coating comes next? Then choose the exact product whose instructions fit those answers. Explore more wooden furniture, care and home project guides at Wood Center.