WOODEN FURNITURE & HOME
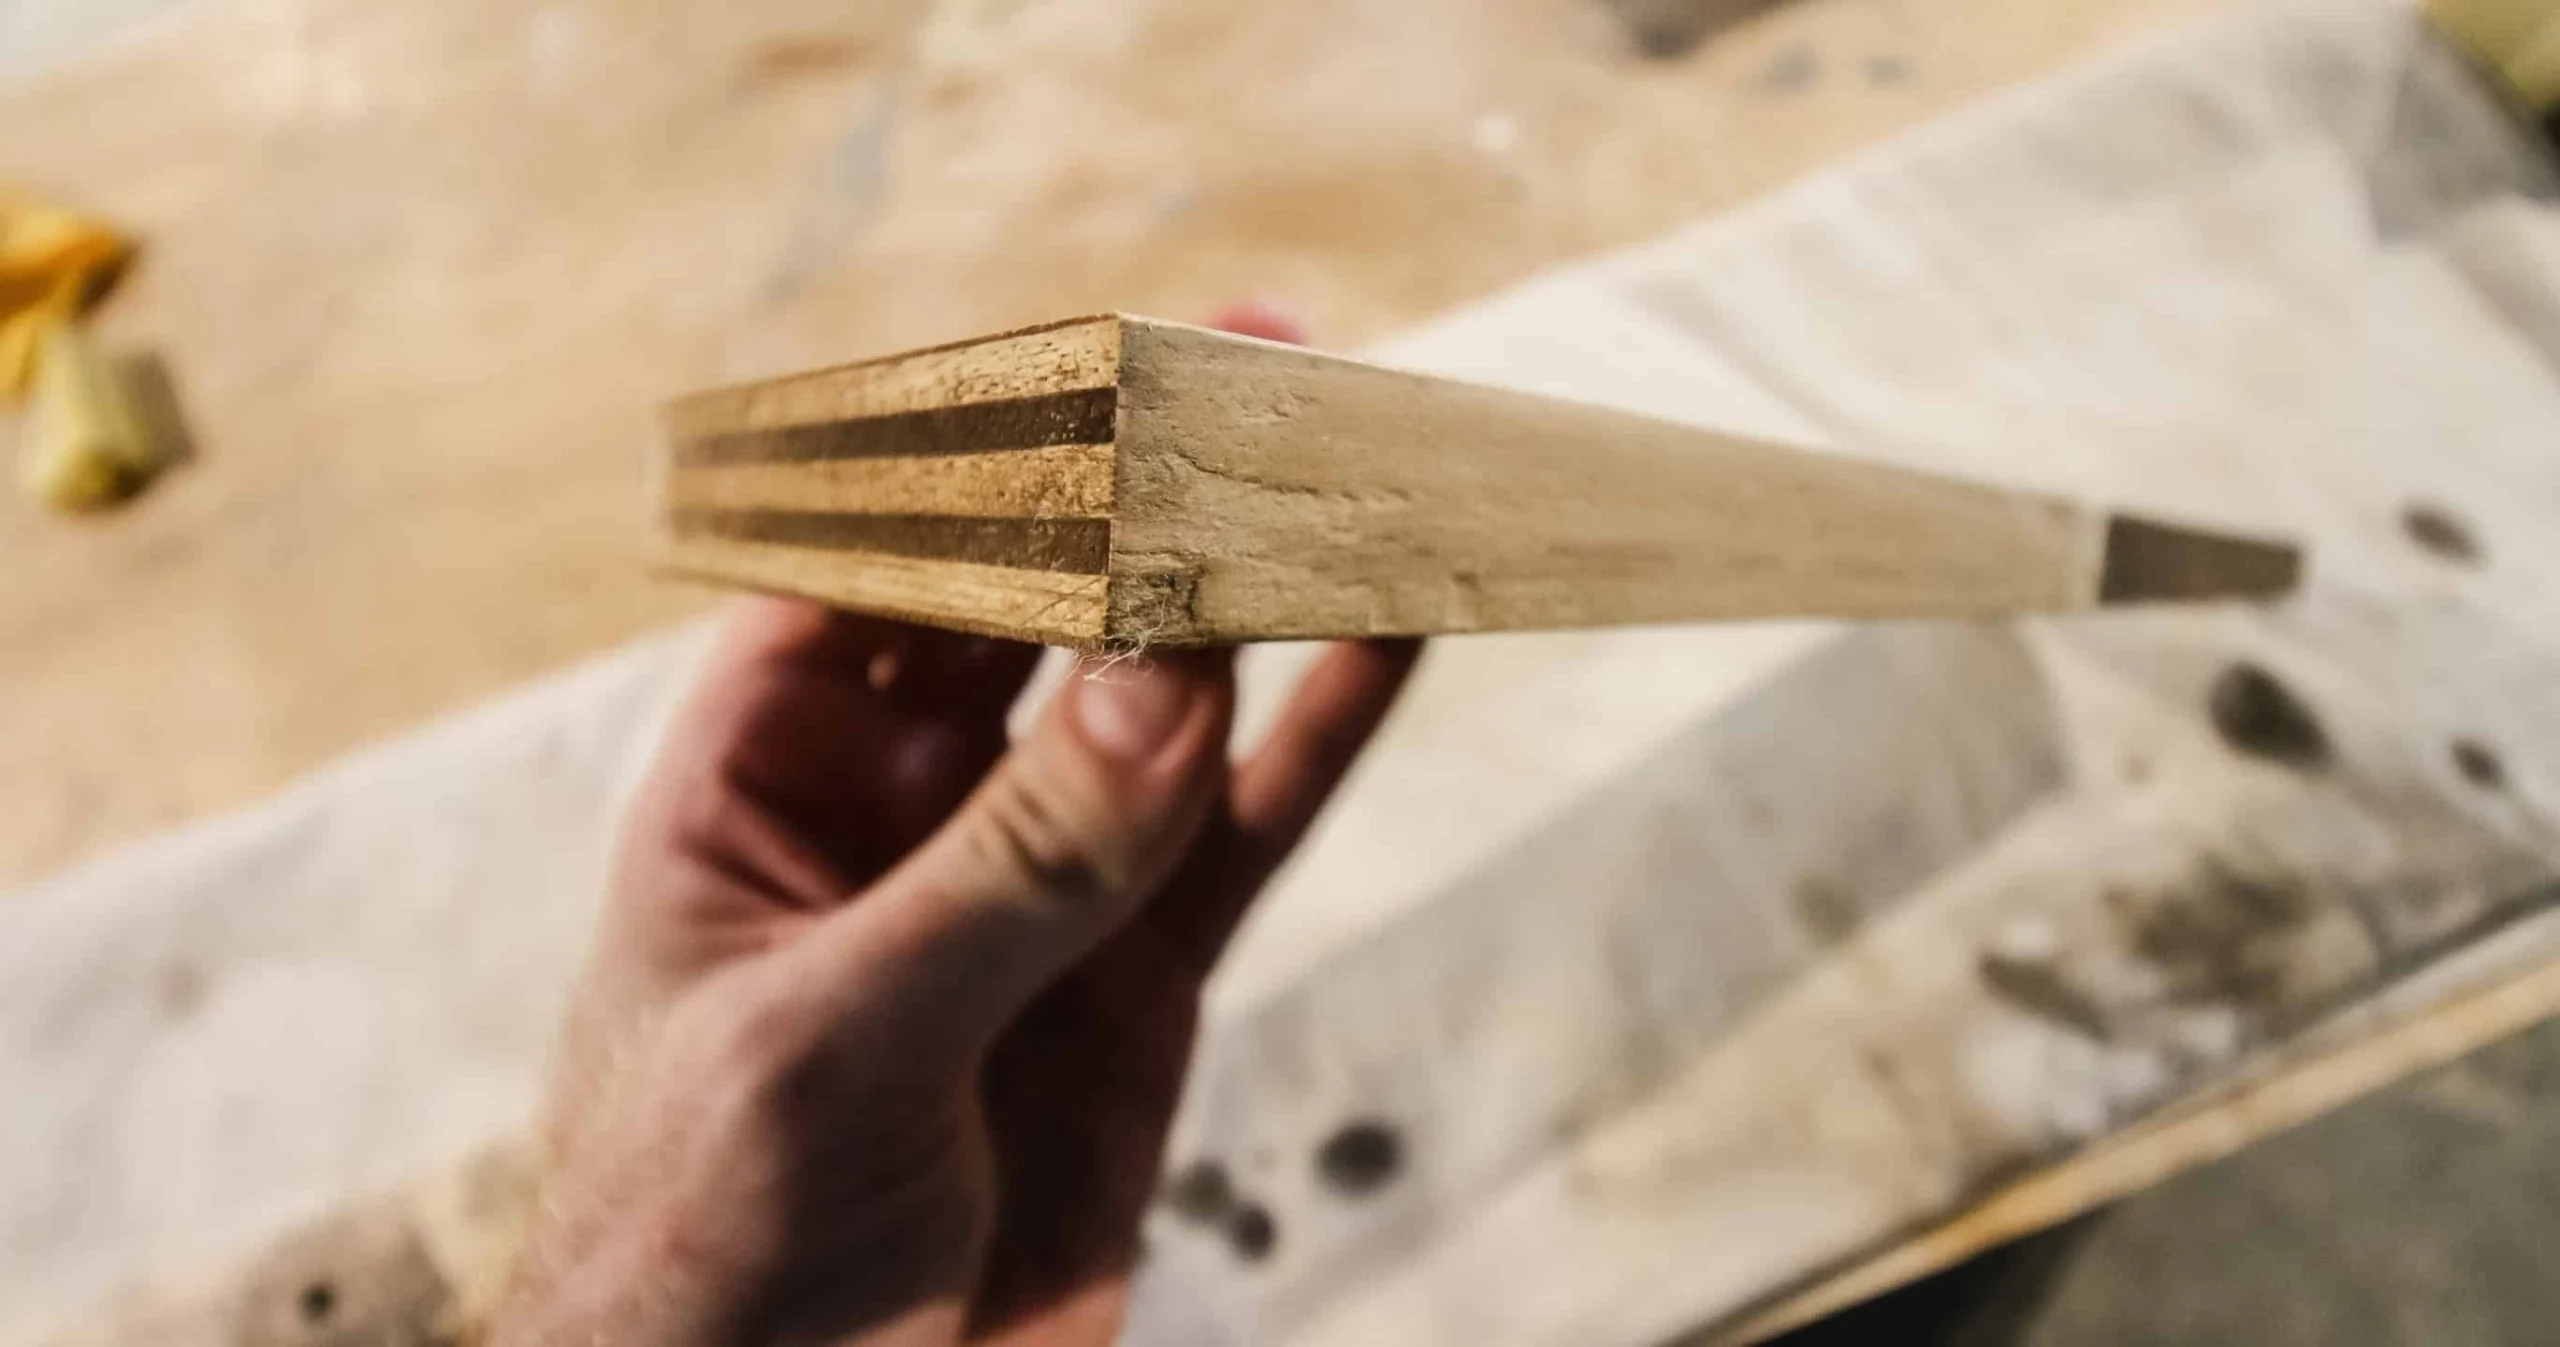
Plywood edge finishing starts with deciding whether the finished edge should be painted, show wood grain, or have a thicker wood border. Choose sandable filler for a painted edge, veneer edge banding for a thin wood covering, or solid wood trim when a separate strip suits the furniture’s shape. The choice changes both the appearance and the work needed before finishing.
These examples compare the methods and their practical tradeoffs. They come from separate projects, so the photographs aren’t a side-by-side performance test.
Choose the plywood edge treatment around the final finish
Paint can hide a filler repair’s color, while a clear or stained finish leaves the material itself on display. That’s why the planned coating is a better starting point than choosing whichever edge treatment looks quickest.
| What you want on the finished piece | Method to consider | What the work involves |
|---|---|---|
| A painted edge with small voids filled | Sandable, paint-compatible wood filler | Filling, drying and leveling the edge before coating |
| Wood grain along the edge without a substantial border | Real-wood veneer edge banding | Bonding a thin strip, then trimming its overhang |
| A distinct wood border on a shelf or furniture panel | Solid wood trim, also called nosing | Fitting and attaching a strip, then bringing its surfaces into alignment |
For a painted storage shelf, filler may give the appearance you’re after without adding a wood strip. For a plywood bookcase with visible wood grain, banding is the closer fit. A shelf front with a deliberate border is a reason to consider solid trim.
Existing furniture needs another decision first: whether its surface and edge are sound enough for cosmetic work. Before covering an old edge, use the furniture makeover overview to distinguish surface flaws from problems with the furniture itself.
Wood filler hides plywood edge voids under paint
Of the three choices, filler addresses the holes and unevenness within the exposed edge. It fills those spaces rather than placing a continuous wood covering over them.
The example below shows filler being worked into the narrow edge. The useful detail is where the material goes: into the gaps between layers, where a smooth painted surface would otherwise be interrupted.
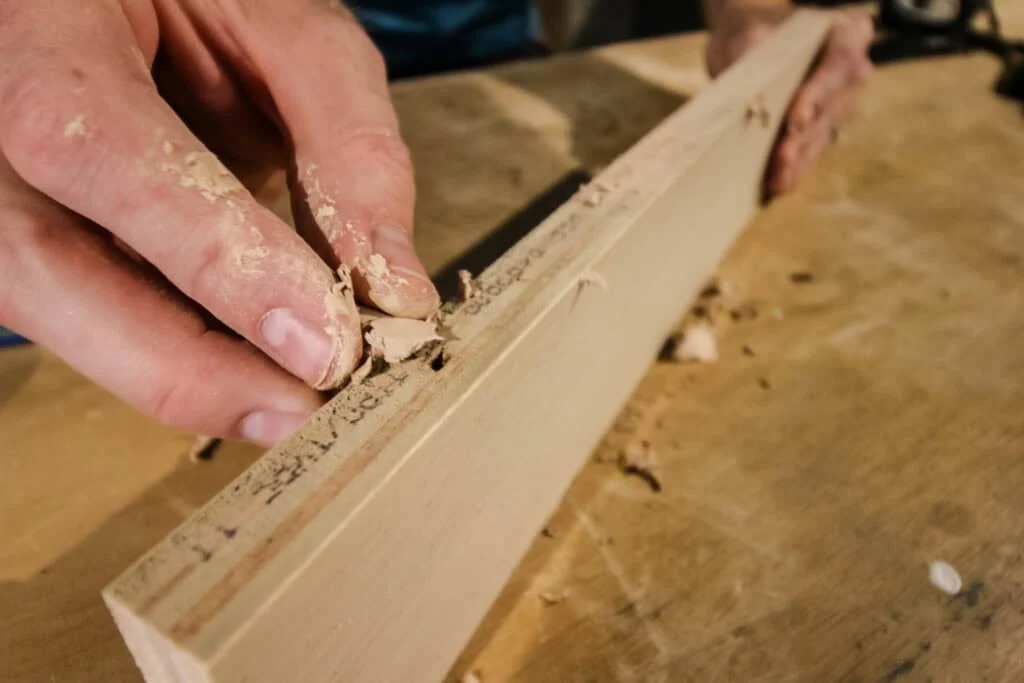
Choose a formula that permits sanding and the intended coating. The application tool, drying conditions and permitted repair depth come from that product’s directions; a photograph of finger application isn’t a reason to handle every filler that way.
A filled edge still needs leveling before paint. Allow for that work when comparing it with banding: skipping the added strip doesn’t mean skipping surface preparation.
Filler is less convincing when the goal is an uninterrupted strip of visible wood grain. Even a stain-compatible formula doesn’t recreate grain across a broad repair. Read about sandable fillers and soft touch-up putties before choosing a tub by its name alone.
Veneer edge banding covers plywood with a thin wood strip
Where filler prepares an edge for paint, real-wood veneer banding provides a wood surface that can also suit a stained project. Match the veneer to the intended appearance of the plywood face, then check the finish on a sample instead of assuming the colors will match.
Iron-on banding has adhesive on its back that is activated by heat. Other banding products use different attachment methods, so the iron belongs to the iron-on option specifically.

The work is more than passing an iron along the strip. Pressure seats the banding against the edge, and excess material must be trimmed to the panel. In This Old House’s banding method, pressing follows heating, and cooling comes before trimming. Use the selected band’s instructions for heat settings and handling.
Banding also affects the assembly plan. An exposed shelf edge may be easy to reach before assembly and awkward afterward, so decide which edges will remain visible while you can still position the parts freely on the workbench.
Don’t confuse thin with invisible. A veneer strip has thickness, and its trimmed junction with the plywood face still needs attention. If the panel will also be screwed into an assembly, choose the plywood fasteners around the joint and actual thickness.
Solid wood trim adds a separate border to the plywood
If that thin veneer edge isn’t the look you want, a solid wood strip gives you an actual piece of wood along the panel’s edge. This border can suit either a painted or stained project, depending on the wood and finish.
The strip changes the part’s finished dimensions. Account for it when planning the shelf’s projection and nearby clearances; don’t assume an already fitted panel will occupy the same space after trim is added.
The clamped example below shows the main fitting challenge. The strip must sit against the plywood edge while its height is checked against the face. Here it is slightly raised for later leveling.
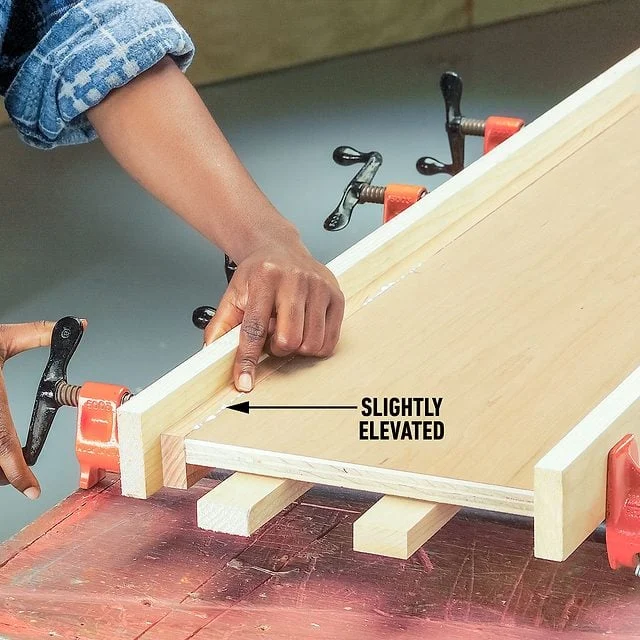
That leveling work deserves room in the decision. The solid strip and thin plywood face aren’t equally forgiving of material removal. Our wood-sanding guide covers controlled preparation and the limits of sanding thin veneer.
Choose this route because you want the border and can fit it properly. A photograph of attached trim doesn’t establish how much weight a shelf can carry. For the glue line beneath that strip, compare wood glue and epoxy by the actual fit and exposure.
Check one finished plywood offcut before committing
Once the method fits the design, a small sample answers a more useful question than comparing unfinished photographs: does this particular edge look right with your planned coating?
For filler, judge whether the painted edge looks even. For banding, inspect the junction with the face and the finished color. For solid trim, consider the border’s size as well as the transition between the two surfaces.
Keep the offcut beside the furniture parts while choosing the finish. It’s a place to resolve the edge detail before that decision runs across every visible shelf. Explore more wooden furniture, care and home project guides at Wood Center.